🔓 Get All Tools for FREE!
- ✅ Click here to open a trading account using our referral link and start trading.
- 📅 After 7 days of active trading under our referral link, you can get access to all tools in your account.
- ⚠️ Keep trading to keep access free — if you're inactive for 7 days, your access will be removed.
- 👉 Already have an account? You can change the IB (introducing broker) to our referral link ( https://one.exnesstrack.org/a/w7syl3vnjb ) and still qualify!
In the world of trading, timing is everything. Many traders struggle to find precise entry points, often missing out on profitable trades because they couldn’t catch the right retracement. This is where the Retracement to Order Block indicator comes in. Developed to help traders capture ideal entries on price retests, this powerful tool identifies key order blocks—zones where price commonly reacts—allowing for enhanced opportunities for both long and short entries. Let’s dive deeper into what makes this indicator so essential, how it works, and how to use it effectively on TradingView.
What is the Retracement to Order Block Indicator?
The Retracement to Order Block indicator is a unique technical tool designed to help traders identify specific zones, known as order blocks, where price is likely to react. Order blocks are crucial points on a chart where buyers or sellers have previously entered the market in significant quantities, influencing future price behavior when these levels are revisited. This indicator doesn’t just mark these order blocks but also generates retest signals, giving traders clear guidance on when to enter or exit trades based on price retracements to these levels.
🔓 Get All Tools for FREE!
- ✅ Click here to open a trading account using our referral link and start trading.
- 📅 After 7 days of active trading under our referral link, you can get access to all tools in your account.
- ⚠️ Keep trading to keep access free — if you're inactive for 7 days, your access will be removed.
- 👉 Already have an account? You can change the IB (introducing broker) to our referral link ( https://one.exnesstrack.org/a/w7syl3vnjb ) and still qualify!
This indicator is ideal for traders looking to capitalize on missed retracements, as it highlights high-probability trading setups that occur when price returns to order blocks. With easy-to-interpret signals for both long and short trades, it makes trading setups more visible, improving overall trading strategy and timing.
Why This Indicator is a Must-Have for Traders
Missed retracements are a common frustration in trading. Imagine a scenario where you see a strong trend forming, but before you enter, the price has already moved beyond your ideal entry level. Waiting for a retracement might seem like a good idea, but identifying exactly where it will happen can be difficult. The Retracement to Order Block indicator solves this by marking precise levels where price retracements are likely to occur. As a result, traders are better positioned to capture favorable entries in both trending and ranging markets.
This indicator provides:
- Enhanced Entry Points – It identifies key order blocks, allowing traders to take advantage of price retracements with confidence.
- Clear Retest Signals – Whether you’re trading long or short, the indicator gives clear signals on price retests, making trade entries more precise.
- Increased Confidence – With predefined order blocks and signals, traders can make decisions with greater accuracy, reducing the uncertainty often associated with retracement entries.
How the Retracement to Order Block Indicator Works
The Retracement to Order Block indicator focuses on two main types of trades: long and short. Each trade setup involves identifying specific candle patterns that signify potential order blocks, combined with momentum-based retest signals. Here’s a breakdown of how it works for both long and short trades:
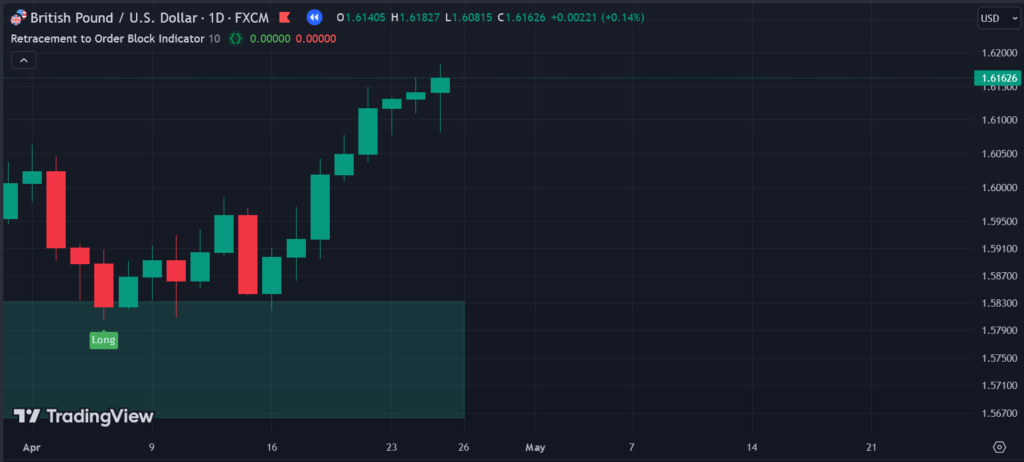
Long Trade Setup
- Order Block Identification: The indicator detects an order block candle with a body of at least 66% that breaks the low of the last 10 candles. This signifies a potential buy zone or demand area where price might return.
- Break and Retest Signal: When a strong momentum candle breaks above this order block, it signals bullish strength. If the price retraces back to this level, the indicator generates a long retest signal.
- Entry Point: The long retest signal provides a clear entry point for a long trade, with the expectation that price will move upward from this level.
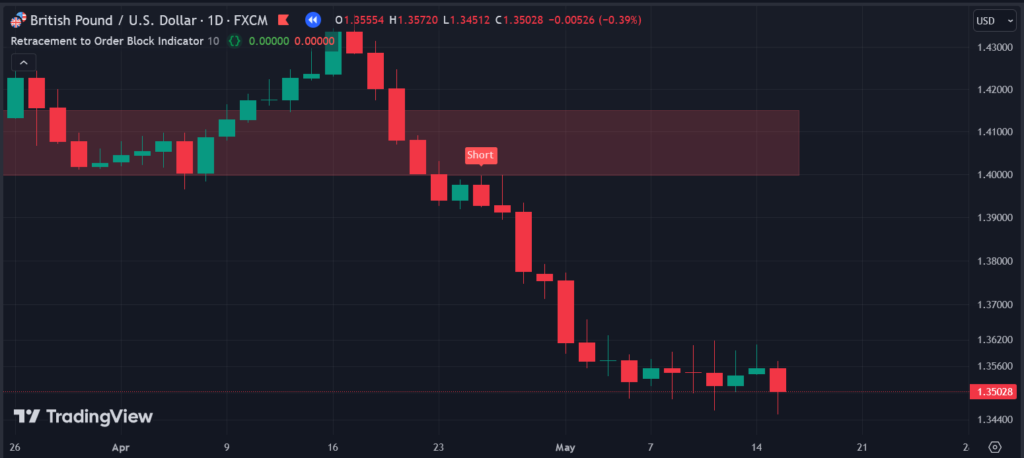
Short Trade Setup
- Order Block Identification: For short trades, the indicator identifies a candle with similar properties that indicates a bearish order block. This candle’s body also covers at least 66% and closes below a specific support level.
- Break and Retest Signal: When a momentum candle closes below this bearish order block, it signals a potential continuation downward. If the price then retraces back to this level, the indicator issues a short retest signal.
- Entry Point: This short retest signal serves as the entry point for a short trade, with an expectation that price will decline from this level.
With a straightforward approach, the indicator provides traders with actionable, easy-to-interpret signals, reducing the ambiguity and enhancing timing for both long and short trades.
How to Use the Retracement to Order Block Indicator on TradingView
Using this indicator on TradingView is simple and effective. Here are the steps to follow:
- Add the Retracement to Order Block Indicator to Your Chart: Search for and add the indicator to your TradingView chart to start analyzing potential setups.
- Look for Long Retest Signals: When a momentum candle breaks above an order block, watch for the price to retrace back to this level. If it does, the indicator will generate a long retest signal, suggesting a potential buy entry.
- Watch for Short Retest Signals: For short trades, look for a momentum candle that closes below an order block. When the price retraces to this level, the indicator will issue a short retest signal, signaling a potential short entry.
- Execute Trades with Confidence: Use the retest signals as your entry points for long and short trades. These signals help you enter or exit trades based on price action and market structure, improving the accuracy and timing of your trades.
Best Practices for Using the Retracement to Order Block Indicator
To maximize the effectiveness of this indicator, here are a few best practices to consider:
- Combine with Other Indicators: Although this indicator can work well on its own, using it alongside additional indicators such as RSI, MACD, or moving averages can help confirm signals and strengthen trading setups.
- Adjust Timeframes: The Retracement to Order Block indicator works across multiple timeframes, so consider analyzing both higher and lower timeframes to identify the most reliable setups.
- Monitor Price Action: Even though the indicator provides clear retest signals, understanding price action around these levels can help you make more informed decisions.
Benefits of Using the Retracement to Order Block Indicator
The Retracement to Order Block indicator offers multiple benefits for traders of all experience levels:
- Precision: With well-defined order blocks and clear signals, this indicator helps you capture entries with precision, minimizing the chances of missing profitable setups.
- Simplicity: The indicator is straightforward and easy to interpret, making it accessible to both beginners and advanced traders.
- Versatility: Applicable to forex, crypto, and stock markets, the indicator adapts well to various asset classes, enhancing trading opportunities across the board.
- Reduced Emotion-Driven Decisions: Having clear, rule-based signals helps reduce emotional decision-making, enabling a more disciplined approach to trading.
Why This Indicator is Perfect for Both Novice and Pro Traders
The Retracement to Order Block indicator is built with a single focus: helping traders enter and exit trades at optimal points based on retests at key price levels. Novice traders can benefit from its simplicity and clarity, while professional traders can appreciate its precision and the high-quality signals it generates. In a world where market moves can often be unpredictable, this indicator offers a structured way to approach trading with confidence.
Contact us at +91 7620658346 for access to this indicator. We offer algo development for TradingView indicators, MT4/MT5, and trading bots.
Follow us on Instagram, YouTube, and Twitter @algo_aakash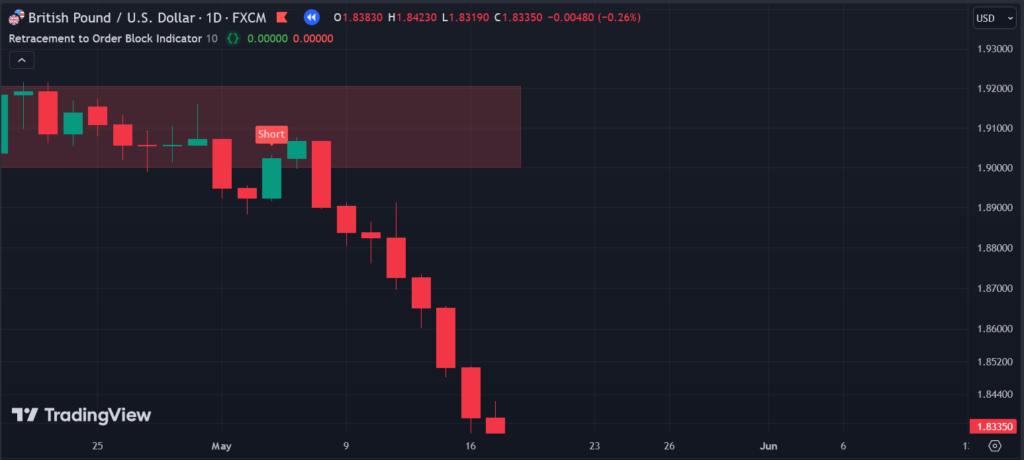
Conclusion
The Retracement to Order Block indicator is a powerful addition to any trader’s toolkit, especially for those looking to enter trades with precision at key market levels. By identifying order blocks and signaling price retests, this indicator provides traders with actionable insights for both long and short entries. Its straightforward signals and high-probability setups make it an ideal choice for traders of all levels, from beginners to professionals. Using this indicator can help you avoid missed retracements, improve trade timing, and approach the market with a structured, disciplined strategy.
Disclaimer
This indicator is a trading tool designed to assist in technical analysis; however, it does not guarantee profits and is not a substitute for independent research or professional financial advice. Trading in financial markets carries inherent risks, and results can vary based on individual skill, market conditions, and other factors. Past performance is not indicative of future results. Use this indicator as part of a well-rounded strategy and always trade responsibly, only investing funds you can afford to lose.
0 Comments